

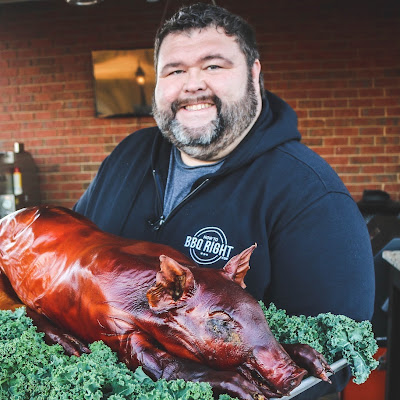
HowToBBQRight
HowToBBQRightVideo
- Format:
- YouTube channel
- New videos:
- Several times a week
- Typical length:
- under a minute
- Latest video:
About this show
HowToBBQRight with Malcom Reed
Welcome to HowToBBQRight -- a channel dedicated to all things barbecue, slow-smoked and grilled. Each week I share a new recipe. I'm always working to improve my barbecue skills and smoking recipes and I love sharing it with you.
Subscribe to my YouTube channel right now - and I'll send you notifications as soon as I release new videos.
Videos come from the channel's public YouTube feed. The artwork is the newest video thumbnail. Last updated . Names, artwork and text belong to their publishers.
Cosmos
Similar by topic and creator
- Mini Foodkey
Shares the topic Food. - Chef Tyler
Shares the topic Food. - Sugar Spun Run
Shares the topic Food.
Videos
- Not rated yet
- Not rated yet
stop using water in your brine… use luzianne tea instead! #bbqshorts
· 43 sec
#luziannetea #ad #turkey
Not rated yet- Not rated yet
Brine Your Thanksgiving Turkey - Turkey Brining Explained
· 2 min
Why Brine a Turkey? If you want a juicy Thanksgiving turkey, start with the brine. Turkey is lean meat without much fat, and it doesn't have a lot of flavor on its own. A good brine helps it hold onto moisture while it cooks and gets flavor deep into the meat. WHAT YOU NEED TO BRINE A TURKEY - Malcom's Bird Brine - https://bit.ly/H2Qbirdbrine - HowToBBQRight Meat Bags - https://bit.ly/H2QMeatBags - Raised Rack - https://bit.ly/BBQRack What about turkeys with an added solution? Most grocery store turkeys already contain an added saltwater solution, but I don't consider that a substitute for a good brine. I still brine every turkey I cook Start with a Completely Thawed Turkey If the turkey is still icy when you drop it in the brine, it doesn't seem to absorb the brine as well. What Goes in a Turkey Brine There are plenty of good brine recipes out there, but I use my Bird Brine because it's already got the salt, sugar, herbs and seasonings mixed together. You can add fresh lemons, oranges or whatever flavors you like. Most people use water, but you can also use apple juice, cider or even beer. Lately, I've really been liking sweet tea for the flavor and the good color it gives the turkey while it brines. How Long to Brine A good rule of thumb is about an hour per pound, but I pretty much brine all my turkeys for 24 hours regardless of the size. Turkey Size — Brining Time 8–12 lbs: 8–12 hours 12–16 lbs: 12–16 hours 16–20 lbs: 16–20 hours 20+ lbs: 20–24 hours Keep Your Turkey Cold If you've got room in the refrigerator, a brining bucket works great. Otherwise, I put the turkey and brine in a Meat Bag, set it in a cooler and pack ice around it. Either way, make sure the bird stays completely submerged in the brine and the temperature stays at 40°F or below the entire time. Dry the Skin Once your turkey comes out of the brine, get the skin as dry as possible. Pat it down really well with paper towels, including inside the cavity. But if you've got the time, put the turkey on a raised rack in the refrigerator for a couple hours. That air circulation helps dry the skin even more, giving you better browning and crispier skin when you cook it.
Not rated yetWhat I've Learned About Smoking Turkey
· 3 min
15 Tips for Smoking Your Thanksgiving Turkey WHAT YOU NEED TO SMOKE A TURKEY - Malcom's Bird Brine - https://bit.ly/H2Qbirdbrine - HowToBBQRight Meat Bags - https://bit.ly/H2QMeatBags - Raised Rack - https://bit.ly/BBQRack - Killer Hogs AP Seasoning - https://bit.ly/TheAPRub - Pitmaster Gloves - https://bit.ly/H2Q_BBQGloves 1. A Saltwater Solution Isn't a Brine. Most supermarket turkeys are packaged with a water and salt solution, but that doesn't replace a good brine for flavor and moisture retention. 2. Thaw Your Turkey Completely. A partially frozen bird won't absorb the brine as evenly. 3. Make Time for the Brine. This is the single most important step for a juicy, flavorful turkey. Plan ahead for a 12 to 24-hour brine to help the meat hold moisture during cooking and build flavor deep into the meat. 4. Make Brining Easier. Use an extra-large zip-top Meat Bag inside a bucket to keep the turkey submerged, contain the mess, and make cleanup easier. No refrigerator space? Use a Meat bag inside a cooler with ice to keep the turkey at 40°F or below. 5. Dry Skin = Better Skin. Pat the turkey dry after brining. For even better results, leave it uncovered on a rack in the fridge overnight. The drier the skin, the better it browns and crisps. 6. Fill the Cavity with Aromatics. Pack the cavity with onions, garlic, vegetables, and herbs to add mass, help the turkey cook more evenly, and add a little moisture and flavor. 7. Tuck the Wings and Tie the Legs. Protects the wing tips from overcooking, keeps the aromatics inside the cavity, and gives the turkey a nice, uniform shape. 8. Oil the Skin. Helps seasoning stick and promotes browning and crispier skin. 9. Season Evenly for Better Color. Get an even coat of seasoning all around the turkey. Heavy spots can turn dark and leave you with blotchy skin instead of that beautiful, golden-brown finish. 10. Smoke Turkey on a Raised Rack. Better airflow, easier rotation, and a pan underneath to catch all those drippings. 11. Smoke at 325°F. This higher cooking temperature helps the skin brown and crisp while keeping the cooking time shorter so the breast meat doesn't dry out. 12. Rotate Every 45 Minutes. Rotate the turkey for even cooking and lightly spray with cooking oil as needed to help maintain that beautiful golden-brown color. 13. Getting Too Dark? Grab Some Foil. Once you've got that perfect golden-brown color, loosely tent with foil to keep it from getting darker while it finishes cooking. 14. Nail Your Internal Temperature. Put a thermometer in the thickest part of the breast to prevent overcooking. I pull my turkey at 160°F and let it rest and carryover to 165°F for perfectly cooked, juicy, tender turkey. 15. Let Your Turkey Rest Before Carving. Give it 20–30 minutes to rest so the juices can redistribute throughout the meat for a juicier, more tender turkey.
Not rated yet- Not rated yet
little beverage for the adults trick or treating this year!! #cocktail
· 57 sec
🍎 Caramel Apple Sweet Tea -3 cups Luzianne Sweet Tea-1½ cups Jack Apple-1 cup apple cider-¼ cup lemon juice-Caramel sauce-apple slices #trickortreat #luziannetea #ad
Not rated yet- Not rated yet
- Not rated yet
- Not rated yet
- Not rated yet
- Not rated yet
little instant read thermometer for your pork butt #bbqshorts
· 15 sec
#pulledpork #porkbutt #howtobbqright
Not rated yetWhy Hot & Fast makes Pulled Pork Taste Better
· 9 min
I partnered with Tyson for this Smoked Pork Butt recipe - it's cooked hot and fast in just 5 hours, but the real reason I love this method is the flavor... Cooking the pork over hot coals lets all those drippings hit the fire and come back up as smoke, giving you a charcoal-smoked flavor you just can’t get cooking low and slow. #TysonBrandPartner #pulledpork #bbq SHOP TYSON x KILLER HOGS BBQ: https://www.walmart.com/browse/fire-up-fall-with-bbq-essentials-for-every-cookout/0/0/?_refineresult=true&_be_shelf_id=2373646&search_sort=100&facet=shelf_id:2373646 WHAT MALCOM USED IN THIS RECIPE: - Killer Hogs The BBQ Rub https://bit.ly/3OGctJd - Killer Hogs AP Seasoning https://bit.ly/TheAPRub - Killer Hogs The BBQ Sauce https://bit.ly/TheBBQSauce - Red Handle 5" Flexible Curved Knife https://bit.ly/H2QKnife5 - Disposable BBQ Cutting Boards https://bit.ly/BBQBoards - BBQ Gloves https://bit.ly/H2Q_BBQGloves 5-Hour Pork Butt Recipe - 1 whole pork butt - Killer Hogs AP Seasoning - Killer Hogs The BBQ Rub - Killer Hogs The BBQ Sauce Directions 1. Prepare a smoker for cooking at 300°F. For this method, you need a cooker that allows the pork to sit 22–24 inches directly above the hot coals, with no heat deflector between the meat and the fire. That distance is important. It allows the pork to cook over the coals without being too close to the fire, while the drippings can still fall onto the coals and create that signature flavor. A drum smoker is ideal for this setup. 2. Score the fat cap in a grid pattern, cutting through the fat but not deep into the meat. This helps the fat render and allows more seasoning and smoke to penetrate. It also creates those little barked-up pieces of fat cap that make some of the best bites at the end. 3. Season the pork butt all over with a base layer of Killer Hogs AP Seasoning, then apply a heavy coat of Killer Hogs The BBQ Rub. Work the seasoning into the scored fat cap and make sure the pork is coated well on all sides. 4. Place the pork butt on the cooking grate fat side up, directly over the hot coals. 5. Cook at 300°F for 3 hours. As the pork cooks, the fat and meat juices drip onto the hot coals, creating smoke that comes right back up around the meat and builds that distinct charcoal-smoked flavor. 6. After 3 hours, remove the pork butt from the pit and place it on a large sheet of heavy-duty aluminum foil. Pour Killer Hogs The BBQ Sauce over the pork, then wrap it tightly. 7. Insert a meat probe through the foil into the pork butt and return it to the smoker. 8. Continue cooking at 300°F for about 2 more hours, or until the internal temperature reaches 202°F and the pork is tender. 9. Don’t skip the rest. After cooking this pork hot and fast, it needs time to rest before you pull it. Place the wrapped pork butt in a dry cooler for at least 1 hour. This gives the juices time to redistribute so they stay in the meat instead of running out when you pull it. 10. Unwrap the pork butt and pull the meat, mixing in the bark and those pieces of rendered fat cap. Serve with Killer Hogs The BBQ Sauce.
Not rated yet- Not rated yet
my go-to tailgate recipe this football season #bbqshorts
· 1 min
#footballfood #appetizers #howtobbqright
Not rated yet- Not rated yet
- Not rated yet
- Not rated yet